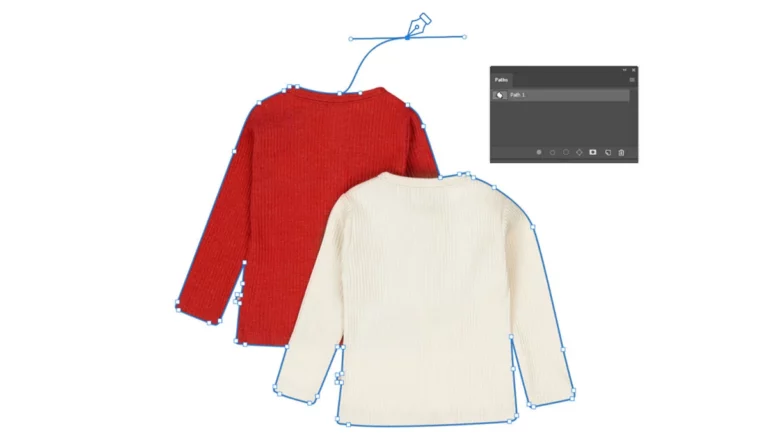
Creating an outline for an image can effectively highlight the subject and make it stand out from the background. Outlines are commonly used when designing thumbnails or banners for social media platforms and advertising banners. Adding an outline to an image can make it visually appealing and capture the attention of viewers, thereby increasing customer engagement. You will become a master of outlining images in Adobe Photoshop with this step-by-step guide on how to outline an image in Adobe Photoshop.
There are several ways to create an outline in Photoshop, and outlining an image becomes convenient through the use of the Layer Style panel and the Stroke option. With these tools, you can easily add an outline to an entire image or specify a particular subject by selecting it.
How To Outline An Image In Photoshop
Step 1. Open Your Image
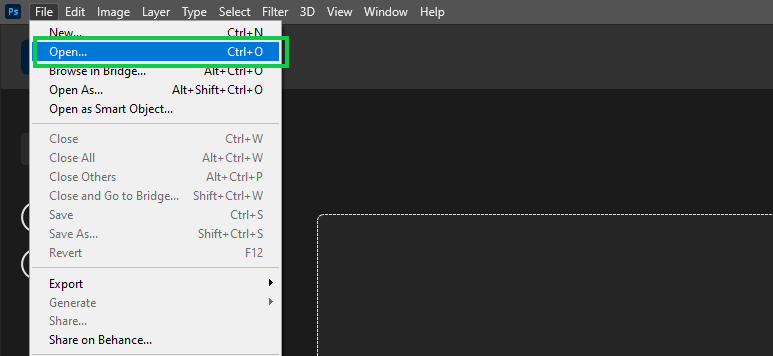
To start outlining an image in Photoshop, launch Photoshop and click on “File.” Then, select “Open” and choose your image to open it in Photoshop.
Alternatively, you can use the keyboard shortcut Ctrl + O (Windows) or Command + O (Mac) to open the file explorer window directly.
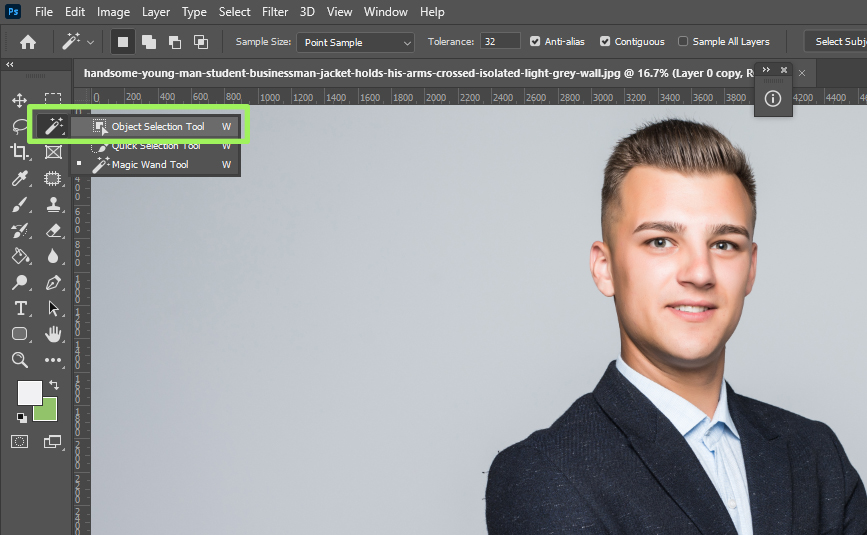
Step 2. Select the Object Selection Tool.
To select the subject in your image, navigate to the toolbar and choose the “Object Selection Tool” or press the letter “W” on your keyboard. Please note that this tool is only available in Photoshop CC 2020 and newer versions. If you are using an older version, you can use the Quick Selection Tool as an alternative to select the subject.
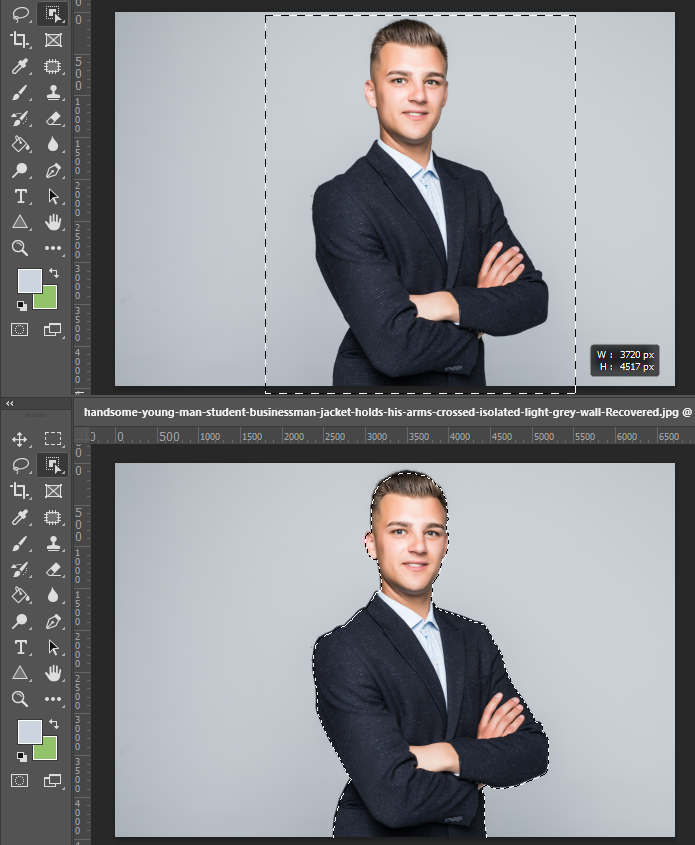
Step 3. Select the subject in your image.
Now, click on the image and drag out a rectangular selection around your subject. Once your subject fits inside this box, release the mouse button, and the tool will automatically select the subject for you. After selecting the subject, if there are any irregular edges, you can use other tools in Photoshop to refine and perfect them.
Step 4. Make a copy of the subject in a new layer.
Once you have made a perfect selection of your subject, it’s time to copy the selection into a new layer. To copy the selected subject, press Ctrl + J (Windows) or Command + J (Mac).

Step 5. Select the Stroke layer style.
Now, you can add an outline around the subject using the Stroke layer style in Photoshop. There are two ways to access the stroke layer style:
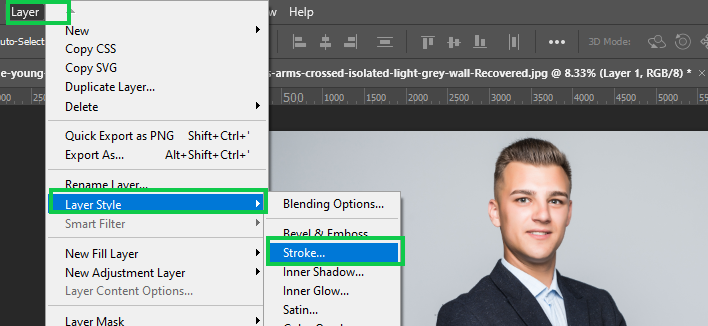
You can access the Stroke option through the top menu. Navigate to “Layer,” then select “Layer Style,” and finally choose “Stroke.” This will open the Layer Style dialog box, allowing you to adjust the stroke settings to your liking.
Alternatively, Double-click on the layer containing the subject. This action will open the Layer Style dialog box, where you can find the Stroke option and customize its settings.
Step 6. Create an outline.
The Stroke layer style allows you to add an outline or border around a selected object or layer in Photoshop. Here’s an explanation of the settings you can adjust within the Stroke layer style:
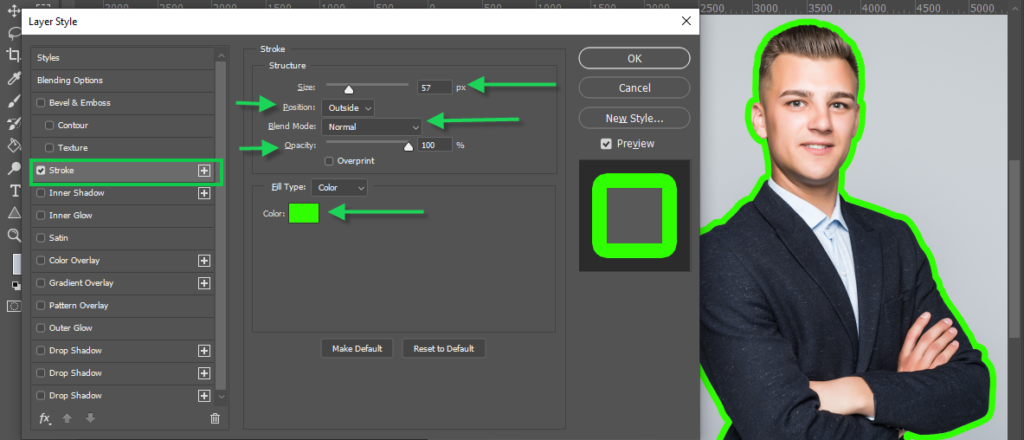
- Position: Set the position to “Outside,” the outline will surround the subject, and increasing the size will expand it further beyond the subject’s boundaries.
- Size: This setting determines the width of the stroke or outline. You can specify the size in pixels, adjusting it to your desired thickness.
- Opacity: Leave opacity 100%. This setting controls the transparency of the stroke. You can adjust the opacity to make the outline more or less visible.
- Color: You can choose a specific color or use the color picker tool to sample a color from the image.
By adjusting these settings, you can create different stroke styles to enhance the visibility and visual appeal of your selected objects in Photoshop. Experiment with the settings to achieve the desired effect for your outline.

How to Outline an Image in Photoshop with Multiple Colors
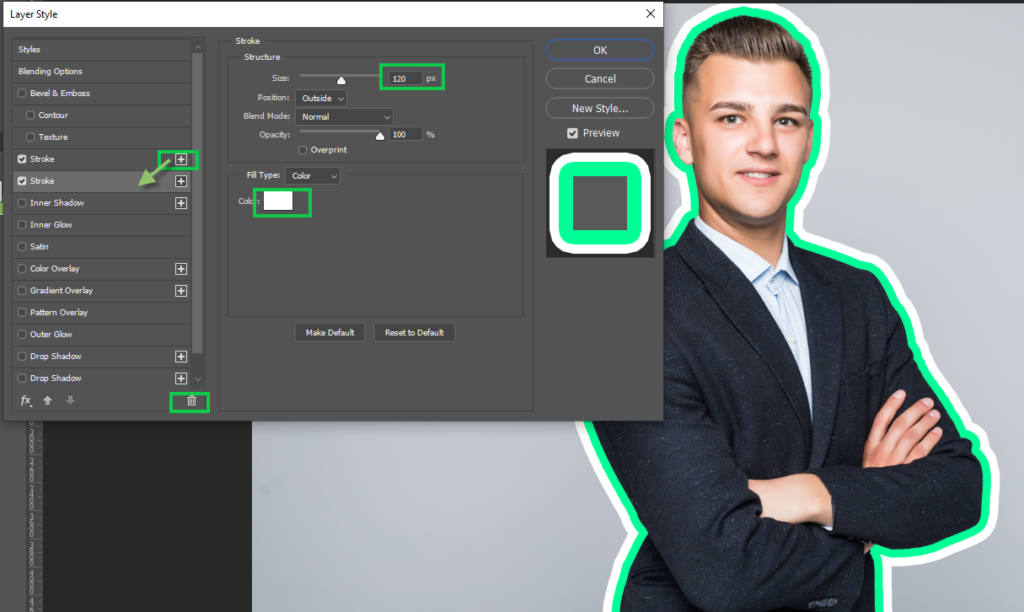
To create multiple color outlines in Photoshop, follow these simple steps. First, make one outline by following the steps mentioned above. Next, make a copy of the stroke layer style by clicking on the “+” icon located to the right of the stroke settings.
Increase the size and change the color of the copied stroke layer style to create a new outline with a different color. Repeat the process by making additional copies of the stroke layer style and customizing the size and color for each outline. By following these steps, you can easily add multiple colors to your outlines in Photoshop.
How to Outline a Complex Subject in Photoshop?
When it comes to a subject with a similar background color, the Quick Selection Tool or Object Selection Tool may not be able to select the subject perfectly. In such cases, you can use the Pen Tool to create a path around the subject, ensuring a precise and accurate selection. By manually creating a path, you have more control over the selection process and can achieve a perfect selection even in challenging situations.
The Bottom Line
Outlining an image in Photoshop may seem like an easy task, but consistent practice is key to enhancing the quality and precision of your outlines. While Photoshop is a tool that can be learned quickly, achieving the best results requires gaining experience. Keep repeating the steps mentioned above until you achieve the desired outcome.


