Author name: Ariful I Evan

Hey, I’m Evan! As a professional Photo Retoucher and creative content writer, I have dedicated the majority of my career to perfecting images and crafting compelling written material. Every week, I publish new articles on Photography, Photoshop, and Lightroom to help you unlock new skills. Follow Me On Social Media Twitter Linkedin

Social Media For Photographers

Best Social Media For Photographers

There are many social media platforms for photographers to promote their work and attract potential clients. Today, I will share some of the best social media platforms that are beneficial for photographers. You can reach a wider, targeted audience by using social media as part of your regular routine. It’s not possible to post on all social media platforms regularly because there are thousands of them. That’s why we’ve identified the best social media platforms for photographers, where you can build powerful networks and ensure that your posts reach a targeted audience by using the best hashtags for photographers.

Best Social Media For Photographers Read More »

Liability Insurance For Photographers

Liability Insurance For Photographers

Liability insurance for photographers is a specialized coverage aimed at protecting them from financial losses. It comes into play when photographers face specific liabilities or legal claims during their photography business activities. This insurance provides coverage for various situations where a photographer may be held legally responsible or face financial consequences. Here are some key aspects of liability insurance for photographers: General Liability Insurance This is the core coverage that protects against common liability claims, such as bodily injury or property damage that occurs during a photography session or on the photographer’s premises. For example, if a client or a passerby trips over photography equipment and gets injured during a shoot, general liability insurance may cover the medical expenses and potential legal costs. Professional Liability Insurance (Errors and Omissions) Professional Liability Insurance, commonly known as Errors and Omissions (E&O) Insurance, is a specialized coverage for professionals and businesses offering professional services. It safeguards against financial losses and legal claims stemming from mistakes, errors, omissions, or negligence in the services provided. This insurance is crucial for various professions, covering the cost of legal defense, settlements, or judgments in the event of client claims alleging professional wrongdoing. E&O Insurance is often required by clients or industry regulations and offers peace of mind, allowing professionals to focus on their work without undue concern about potential legal and financial consequences. It’s distinct from General Liability Insurance, which deals with bodily injury and property damage claims. Property Damage Insurance This coverage can protect a photographer’s equipment, such as cameras, lenses, lighting gear, and props, against damage or theft. It’s essential for photographers who invest heavily in expensive equipment. Hired or Non-Owned Auto Liability If a photographer uses a vehicle for business purposes, this coverage can protect them in case of accidents or damages while using a rented or personal vehicle for work-related activities. How much does photographer insurance cost? The cost of photographer insurance can vary significantly depending on several factors. These factors include the type and amount of coverage you need, your location, the value of your equipment, the size of your business, your claims history, and the insurance provider you choose. To get an accurate idea of how much photographer insurance will cost for your specific situation, you can contact insurance service providers and request quotes. Why is General Liability Insurance Important for photographers? General Liability Insurance is essential for several reasons. It provides vital financial protection by covering legal expenses, settlements, or judgments in the event of lawsuits related to bodily injury, property damage, or other liabilities. Many contracts and clients require it, and it helps build trust by demonstrating your commitment to responsible business practices. General Liability Insurance safeguards your business against lawsuits, ensuring that you can continue operations without facing crippling financial burdens in the event of unexpected incidents or accidents. Final Words Photographers often interact with clients, work on various locations, handle valuable equipment, and deal with contractual agreements. These factors expose them to certain risks, making liability insurance an essential part of their business operations. Without adequate insurance, photographers may have to bear the financial burden of legal fees, medical bills, or damages, which can be financially devastating. Photographers should carefully review their insurance options and consider their specific needs, the type of photography they engage in, and their business structure when choosing liability insurance. It’s advisable to consult with an insurance agent or broker experienced in serving photographers to ensure they have the right coverage for their unique circumstances.

Liability Insurance For Photographers Read More »

SEO Keywords For Photographers

Best SEO Keywords For Photographers

Photography demand is increasing day by day, and finding the best SEO keywords for photographers is the first step to achieving a higher rank in search engine results. Why do keywords matter for the photography business? Imagine you have a beautiful website where you showcase your professional work, but you’re not receiving bookings, and your inbox remains empty. Why? Because your website isn’t showing up in search engine results when clients search for photographers using specific keywords. Do you want to appear at the top of search results when a client is looking for a photographer? After conducting thorough research, I’ve compiled a list of keywords for photographers that are commonly used to search for photographers on search engines. First… What is Keywords? A keyword is a phrase or word that users enter into search engines to find information. For example, if you’re looking for a wedding photographer for your wedding event, you might enter the keyword “Wedding photographer” into the search box. So, “Wedding Photographer” is a keyword. On the other hand, those who have a wedding photography website and offer wedding photography services use this keyword on their website to make themselves visible to people searching for wedding photography services. Keywords play a crucial role in SEO for photographers. What is Keyword Difficulty? Keyword Difficulty is an SEO metric that provides us with an estimate of how challenging it is to rank well in search engine results pages (SERPs). When the competition is higher, the keyword difficulty will also be higher. Conversely, when the competition is lower, the keyword difficulty will be lower. Keywords with scores ranging from 0 to 40 are considered easy to rank in search engine results. Keyword difficulty is measured on a scale of 0 to 100. Keyword difficulty analysis helps SEO practitioners identify which keywords are worth targeting and which may require more effort to rank effectively. What is Search Volume? The search volume indicates how many times users enter a keyword into a search engine within a specified time frame, typically within a month. Understanding search volume is important for SEO because it helps website owners and marketers identify which keywords are worth targeting to attract organic traffic There are many free and paid tools you can use to check the search volume of keywords. I usually use Ahrefs Keyword Generator and Google Keyword Planner for checking keyword search volume, and both are free tools. Keyword and Hashtags: Do You Know the Difference? Keywords are used for SEO and content optimization to enhance search engine visibility, while hashtags are employed on social media platforms to reach a wide audience. Both serve to make content more discoverable but are applied in different contexts and on various platforms. For photographers, using keywords is the best option to optimize their website for higher rankings in search engine results. Conversely, hashtags for photographers are a great way to reach a targeted audience on social media. List of SEO Keywords for Photographers Here are the best keywords for photographers that you can use on your website. In this keyword list, you can find information such as keyword difficulty, monthly search volume, and the keywords themselves. General Keywords for Photographer Here are some general keywords for photographers. These keywords can be used by any photographer on their website. Keyword Keyword Difficulty Search Volume photographer 74 33000 photographers 70 6700 photo studio 77 17000 professional photography 76 2100 photographer near me 61 15000 photo shoot 22 14000 local photographers 56 1900 best photography 50 1200 best photography websites 40 1000 gifts for photographers 22 3700 photography shops 89 350 photography services 27 450 photographer salary 58 4500 freelance photographer 35 3400 Keywords For Commercial Photographers These keywords are specifically tailored for commercial photographers. If you are a fashion, clothing, or product photographer, these keywords are the best choice for your website. Keyword Keyword Difficulty Search Volume product photographer 12 4500 amazon product photographer 30 350 food photography 53 6000 food photographer 17 4000 creative food photography 9 300 product photography 70 7500 amazon product photography 25 800 360 product photography 15 3500 fashion photographer 19 1700 fashion photography 26 8200 professional portrait photographer 43 500 portrait photographer 19 3400 commercial photographer 11 3400 commercial photography 21 3300 what is commercial photography 16 600 pet photography 28 3300 still life photography 30 8400 lifestyle photography 18 1500 headshot 25 28000 professional headshots 40 1700 brand photographer 14 700 Keywords For Wedding Photographers These keywords are specifically tailored for wedding photographers.  Keyword Keyword Difficulty Search Volume wedding photographer 72 2400 wedding photography 73 11000 wedding photographer cost 28 2800 wedding photography prices 35 1700 bridal photography 57 300 event photography 13 2400 event photographer 11 3200 Keywords For Nature photographers These keywords are specifically tailored for nature photographers. Keyword Keyword Difficulty Search Volume Landscape photographer 35 400 landscape photography 55 12000 urban landscape photography 12 300 Nature photography 55 5100 nature photographer 60 800 Wildlife photographer 11 3400 wildlife photography 27 4200 macro photography 42 4100 Additional Keywords for photographers Here are some additional keywords that are good options, but you need to select your keywords from this list. There are multiple photography categories’ keywords. Keyword Keyword Difficulty Search Volume sexy photo shoot 13 2500 newborn photography 14 21000 model photography 17 2500 black and white photography 31 17000 christmas photography 24 800 street photography 52 6000 couple photography 22 1100 birthday photography 17 350 Conclusion Bookmark this article so you can explore this useful keyword list when you need it. SEO keywords for photographers are a game-changer for website optimization. If you work on these keywords, your business will grow dramatically. If you don’t have time or aren’t proficient in SEO, you can hire an SEO specialist who knows everything about SEO for photographers. They can work for you with your targeted keywords. Well-directed efforts in SEO can change your business’s growth at any time.

Best SEO Keywords For Photographers Read More »

LinkedIn For Photographers

Grow Your Photography Business on LinkedIn in 2024

There is a huge chance of getting potential clients from LinkedIn for photographers and a great opportunity to build a powerful business network. LinkedIn is not just a platform for job seekers; it’s a powerful networking and marketing channel where you can acquire a good number of clients in need of photography services. The interesting thing about LinkedIn is that your profile will be visible in search engine results. So, you won’t only get clients from LinkedIn, but there is also a chance to acquire clients from Google and Bing search results. To leverage all of these opportunities, you need to approach it in the right way. How to Set Up a Professional LinkedIn Profile: A Step-by-Step Guide A professional and fully completed LinkedIn profile for photographers is important for appearing in LinkedIn search results as well as in the Google search engine. Here is a step-by-step guide to building a professional LinkedIn profile for photographers. Choose A Profile Picture Choose a clean headshot or portrait photo with a smiling face for your LinkedIn profile. Do not use low-quality or selfie images. The profile picture is the first impression of your professionalism to your clients. So, you need to present yourself as a professional photographer, and a smiling face always adds to your approachability with a friendly demeanor. Choose A Cover Photo In the LinkedIn cover photo, you can use your photo, but there is a chance to showcase a glimpse of your work. It will attract profile viewers to contact you after seeing your great work in the cover photo. On the other hand, you can use a banner where you can add your contact info and company logo along with your photos. Both are acceptable, but showcasing your work in the cover photo is the best use of it. Wedding Photographer LinkedIn profile example Include Primary Keyword in the Headline The LinkedIn heading option is typically used for the job title. As a photographer, you can include your primary photography keywords in your LinkedIn headline. For example, if you are a wedding photographer in Nashville, you can use “Wedding Photographer in Nashville” or “Wedding Photographer at [Your Company Name].” This headline helps the LinkedIn algorithm display your profile in front of the right people. Customize Public profile URL Customize your LinkedIn profile URL with your name or business name. When you create a LinkedIn profile for the first time, LinkedIn automatically generates a profile URL. You can customize it later and make it user-friendly by including your first and last name in the URL. However, there is also an opportunity to use your website username in the URL, as shown in the image above. Add About and Showcase work in The Featured Sections Write a simple and professional about description, including contact information at the end of the description so that anyone can email or call you quickly. Add your recent work to the Featured Section. You can include images or links to your blog in the featured section; it will serve as your portfolio. List Relevant Skills and experience Only Add your experience with a short description in the Experience section. LinkedIn for photographers serves as a CV, so never miss an opportunity to add everything perfectly to make your LinkedIn profile professional and complete. Include all relevant skills in the Skills section. For example, if you are a commercial photographer, you can list fashion photography, commercial photography, and product photography in the Skills section. You can also add photo retouching and photo editing to your skill list because, after completing the photo shoot, you often need to perform photo retouching. Start Growing Your Connections LinkedIn is a powerful networking platform. Start by sending connection requests to your friends first, and then expand to sending requests to clothing business owners, other company owners, CEOs, CTOs, studio managers, COOs, and other individuals in influential positions within the industry. Also, send connection requests to people who are located near you. Avoid sending too many requests in a single day. Aim to gradually grow your connections and try to post at least once or twice a week. If someone posts a job for a photographer, send them a connection request with a personalized note. This is the best way to connect with relevant people. You don’t need to spend all day on LinkedIn; just try to post 5-6 times a month and install the LinkedIn app on your phone. This way, if someone messages you through LinkedIn, you can respond quickly. Turn on job alerts for photographers in your city, so you can send connection requests and apply for relevant projects. What to post on LinkedIn LinkedIn is a professional social media platform primarily used for business purposes, unlike Facebook or TikTok, which are more focused on personal posts and image sharing. Therefore, share your work with an optimized description to gain followers on LinkedIn and Expand your reach to a targeted audience by using photography-related hashtags. If you write blog posts in the blog section of your website, you can share them on LinkedIn to attract more visitors to your website. 🙂 Conclusion LinkedIn for photographers offers a tremendous opportunity to build digital connections and strategically expand your network by initiating connections with colleagues, clients, and relevant business professionals. Millions of business-minded individuals are active online, all striving to grow their businesses by mutually supporting one another. By following the steps outlined above, you can build a powerful network on LinkedIn.

Grow Your Photography Business on LinkedIn in 2024 Read More »

SEO For Photographers

The Ultimate Guide to SEO for Photographers in 2024

Establishing a successful online photography business is difficult without a well-optimized website. SEO for photographers is the key to getting your website ranked on the first page of search engine results. There is a great opportunity to attract a large number of potential clients from popular search engines like Google and Bing. Why should your website be on the first page of search results? Statistics show that Page 1 search results garnered 92% of all traffic from the average search, and traffic dropped by 95% for Page 2 search results. Therefore, with the right SEO strategy, appearing on the first page of search results can attract potential clients to your business and also ensure that your business is visible to the right people in need of photography services. Let’s break down all the steps to do SEO for photographers. 🙂 What is SEO? Search Engine Optimization (SEO) is the process of improving your website’s visibility and ranking on search engine results pages (SERPs). The purpose of SEO for photographers is to get your photography website to rank higher and appear on the first page of search results.  There are various techniques and methods that can be used to optimize your website for better rankings over time. A search engine first crawls the website, then indexes and ranks it. This is the process by which search engines gather, analyze, and rank quality content worldwide. 10 Steps to Improve SEO for Photographers Keyword Research On-Page and Technical SEO Mobile-Friendly Website Organize Your URL Structure SEO Photos for Your Site Create Relevant Engaging Blog Posts Optimize your Titles & Descriptions Focus on Local SEO Do Guest Posting and Build Backlinks Analyze SEO Performance 1. Keyword Research What are keywords for photographers? To attract potential clients from search results, you need to identify the search terms people use when looking to book a photographer. This means you need a list of phrases that describe your services and what you offer as a professional photographer. SEO Keywords for Photographers Example: Suppose you are a London-based wedding photographer. Now, what can people type in the Google search box to find or book a photographer online? They can use search terms like “wedding photographer London,” “Photographer in London,” and “Photographer Near Me.” These are the best keywords for you if you are a London-based wedding photographer. Example of SEO Keywords for Photographers In the screenshot above, you can see a keyword overview of “Photographer in London.” It shows that 590 people use this search term to find a photographer, and the keyword difficulty is only 34%. When the keyword difficulty is less than 40%, you can rank this keyword on Google with well-structured and unique content. You can use keyword research tools to discover keywords for your business, and I recommend hiring an expert keyword researcher to compile a list of keywords for your photography business. How to Use Keywords in Your Content for a Higher Ranking? Placing keywords perfectly is very important for ranking your website on Google. You can place keywords in the main title (H1) and subtitles (H2, H3, H4, H5, H6). Make sure to insert keywords in the first and last 200 words of your page. Place keywords in the meta description because the meta description acts as a summary to describe what the content is about, and its length is typically around 20-25 words (160 characters). Don’t overuse keywords in your website content or titles. You don’t need to include keywords in every subtitle and every line of content. Try to incorporate keywords naturally. Keyword stuffing can negatively impact your content. For example, in this article, my main keyword is “SEO for Photographers”. I placed it in the URL structure, title, and several times within the content. This is the right way to optimize your content with keywords. 2. On-Page and Technical SEO For newly launched photography websites, On-page SEO and Technical SEO are essential components for ranking your website on Google search results. Both focus on different aspects of optimizing a website to improve its visibility and ranking in search engine results (SERPs). Here are the key points of on-page SEO and technical SEO: On-Page SEO Keyword Optimization Content Quality Meta Tags URL Structure Header Tags Internal Linking Image Optimization Technical SEO Website Speed Mobile-Friendly Crawlability Site Structure HTTPS XML Sitemaps 3. Mobile-Friendly Website When planning to build a photography website, it’s essential to use responsive or adaptive design. Responsive web design adjusts your website’s layout based on the screen size of the visitor devices. This approach ensures that your website’s content displays perfectly for visitors on mobile phones, desktops, and tablets. Nearly 55% to 60% of website traffic comes from mobile devices, while 39% comes from desktops and tablets. There are almost 6.92 billion smartphone users worldwide. Therefore, responsive web design is essential for every business to make its website user-friendly. A user-friendly photography website will reduce the bounce rate, increase sales opportunities and improve SEO for photography websites. 4. Organize Your URL Structure It’s important to have a well-structured URL when doing SEO for photographers. Placing keywords in the URL helps visitors quickly understand what they’re on and the purpose of the page. It attracts visitors to navigate your website among thousands of search results. URL Structure Example For example, suppose you’re looking to read photography blogs and use the search term “Photography blogs”. You would typically trust URLs that have a structure like “photography-blog” because that’s what you’re searching for. So, if you’re a photographer in Brisbane, you can simply create a page titled “Photographer in Brisbane” and the URL structure should be “yourdomain.com/photography-in-Brisbane“. 5. SEO Photos for Your Site Image SEO refers to the optimization of images on a website to achieve a higher ranking in search results. Search engines are not humans, and they can’t read an image like we can. Therefore, there are ways to provide them with hints about the content of images. We can help search engines understand images by using ‘Alt

The Ultimate Guide to SEO for Photographers in 2024 Read More »

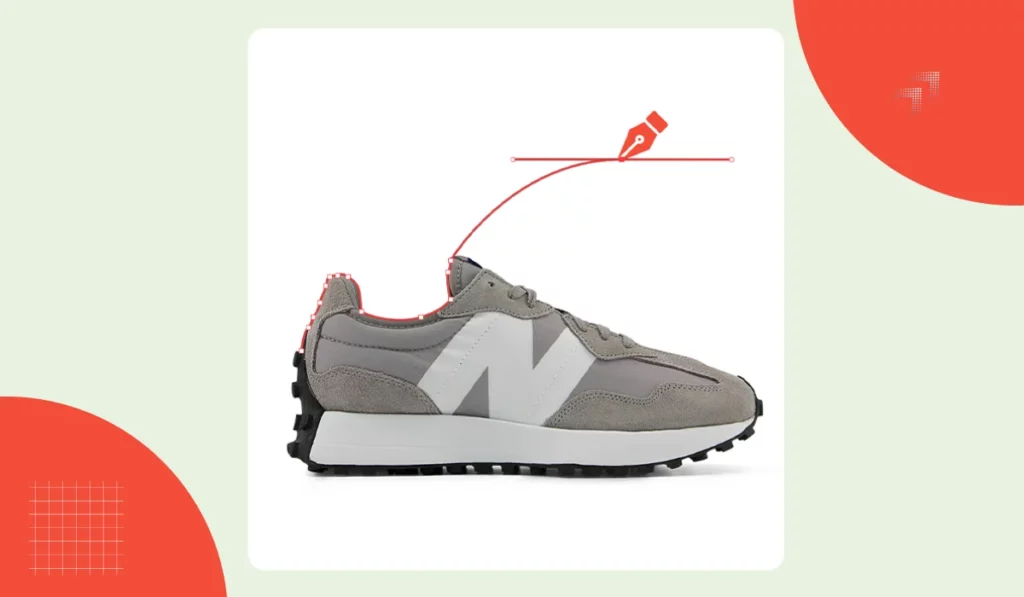
Best Clipping Path Service Provider

7 Best Clipping Path Service Provider Companies

1. Hello Edits If you were to ask me for a recommendation on a clipping path company that offers trustworthy quality work, quick turnaround, and cost-effective services, my suggestion would be Hello Edits. They have earned a reputation as a renowned clipping path service provider and a highly reputable company. With a standard delivery time of 24 hours, Hello Edits also offers expedited delivery within 6 hours for rush orders. Their active customer support ensures quick responses to your queries and concerns. Furthermore, Hello Edits extends a free trial to new customers, allowing you to experience their skills before making a commitment. They have 150+ Photoshop experts, each with a minimum of 5 years of experience in Photoshop and Lightroom. You’ll be pleasantly surprised by their pricing list – starting at just $0.29 per image. What’s more, you can conveniently pay in your local currency, such as GBP, USD, EUR, AUD, and more. They accept all major payment gateways, including credit cards, Mastercard, Visa, PayPal, Payoneer, and bank transfers. Hello Edits offers a comprehensive range of photo editing services, not limited to Clipping Path, Background Removal, Shadow Creation, Ghost Mannequin, Photo Retouching, Image Masking, and more. Whether you’re a photographer or an e-commerce business owner seeking a skilled product photo editor, Hello Edits is the number one choice for you. Pros Quality Guarantee Fast Turnaround Cost-Effective Free Trial Offer Discount on Bulk Orders Cons 2. Clipping Path Shop Clipping Path Shop stands out as another top-tier clipping path company, offering precise and impeccable clipping path services. Their exceptional photo editing services cater specifically to e-commerce products, always delivering on their commitments and ensuring 100% satisfaction. This commitment to satisfaction is particularly appealing when seeking the best clipping path company. They have 100+ designers, and their standard delivery time is between 12 and 24 hours. They also offer rush delivery in just 6 hours. Clipping Path Shop stands as the best option for clipping path services, including multi-clipping path, background removal, photo retouching, ghost mannequin, and other editing services. Moreover, they offer significant discounts for bulk orders. There are a few companies that offer low-cost services with a quality guarantee, and Clipping Path Shop is one of them. They also guarantee image security and provide a free trial. Pros Quality Guarantee Fast Turnaround Cost-Effective Free Trial Offer Discount on Bulk Orders Cons 3. Path Edits Clipping Path India has rebranded as Path Edits. This company has undergone a name change, and now, when you search for a clipping path company, you’ll find Path Edits at the top of your search results. With a strong reputation in the industry, Path Edits is known for providing professional clipping path services. Their starting price is just $0.25 per image, and they have been offering clipping path services since 2004, boasting a team of over 700 employees. Specializing in clipping path services, they also provide a range of other services, including photo retouching, background removal, ghost mannequin, and shadow creation. As a leading clipping path company, Path Edits is dedicated to offering quality services and exceptional customer support. To place an order, you’ll need to sign up, and their client dashboard is user-friendly. For product photographers and e-commerce businesses, Path Edits is the go-to solution for all your post-production editing needs. Pros Quality Guarantee Fast Turnaround Cost-Effective Cons Signup Required 4. Clipping Path Service Clipping Path Service is a company that provides high-quality clipping path and photo retouching services. They have over 70 well-trained graphic designers and offer free trials. Their support team is active 24 hours, and you can place an order directly by signing up on their website. Their standard delivery time ranges from 24 to 48 hours, and they also offer rush delivery within 1 to 6 hours, which may incur an extra charge for faster delivery. Clipping Path Service is rapidly expanding and gaining recognition worldwide. If you are in search of a company that takes full responsibility for the photo editing needs of your project, this company is the best choice for you. Pros Quality Guarantee Fast Turnaround Cost-Effective Free Trial Offer Cons Signup Required 5. Clipping Factory Clipping Factory stands out as one of the best companies for clipping path services. When it comes to a quick and efficient order placement process coupled with professional results, Clipping Factory is the preferred choice. They offer a comprehensive range of photo editing services, including Invisible Ghost Mannequin, Clipping Path, Shadow Creation, Photo Retouching, and Color Correction. While their prices might be slightly higher, the quality of their work is consistently top-notch. With a capacity to deliver up to 4000 images per day, Clipping Factory offers a starting price of only $0.49 per image. Their customer support boasts an impressive average response time of just 5 minutes! Additionally, they provide delivery options of 3, 12, and 24 hours, all backed by a quality guarantee. Pros Quality Guarantee Fast Turnaround Cost-Effective Cons Signup Required 6. Clipping Path Center Clipping Path Center stands as a professional provider of clipping path services. Their highly skilled photo editors ensure a 100% satisfaction guarantee when it comes to quality. With a meticulous approach, they draw paths around objects, using a zoom level of around 300 to 500, to provide clean and crisp clipping paths. A unique feature offered by Clipping Path Center is their monthly payment option for regular clients. This convenience is particularly beneficial for busy customers, eliminating the need for payment after every completed project. While many clipping path companies may offer this to their regular clients, it remains a valuable perk. Their extensive range of photo editing services includes Clipping Path, Photo Retouching, Logo Design, Image Masking, and Image Manipulation, among others. Clipping Path Center ensures quality for every single image, regardless of project size. Their dedicated work ethic guarantees excellent output in the final result. With a 24-hour delivery time and a starting price of $0.39 per image, Clipping Path Center offers an affordable and enticing package. Notably, they emphasize a commitment

7 Best Clipping Path Service Provider Companies Read More »

best photo retouching service

10 Best Photo Retouching Service Companies of 2023

I know you are looking for the best photo retouching company that provides good service at an affordable price and with a fast turnaround. To assist you in this pursuit, I’ve meticulously curated a list of the top 10 photo retouching service providers known for their impeccable reputation and exceptional work. There are many companies available, but not all of them are professional or proficient in retouching photos. Therefore, I have identified these 10 best photo retouching companies to offer hassle-free professional service. Photo retouching service is an essential part of photography. After capturing an image, you need to retouch it to make it perfect for printing and showcasing online. Tasks such as removing unwanted objects, changing backgrounds, color correction, and removing dust are all handled by a photo retouching service provider or photographer. 1. Hello Edits Hello Edits has risen to become a leading Photo Retouching company, highly regarded for providing top-quality services. As an accredited partner of Adobe Photoshop, they have become my top choice for photo retouching services. Whether you’re a photographer or a business owner in need of a reliable photo retouching partner that takes care of all the necessary editing, Hello Edits is the perfect solution for you. They offer their impeccable photo retouching services at an affordable price, starting at only $0.59 per image, with a guaranteed delivery time of 24 hours. Additionally, Hello Edits provides substantial discounts for bulk orders, all while ensuring the highest quality. For their valued regular clients, they offer the convenience of monthly payments, and of course, payment is made after the service is rendered, not in advance. 2. FixThePhoto Whether it’s wedding photos or real estate pictures, FixThePhoto has got you covered for all your photo touch-up needs. They even have a store where you can get free Lightroom presets and Photoshop templates, perfect for beginners who are starting out with photo editing. But if you just want photo retouching help, then FixThePhoto is the best choice for you. Fix The Photos offers different prices for each category. For Wedding Retouching, it’s $0.25 per image. Newborn and Portrait Retouching cost $6 per image. Product Photo Retouching is priced at $2.50 per image, and Restoration is $30 per image. They have a standard turnaround time of 24 hours and guarantee 100% security for your files. Fix The Photos is a trusted photo retouching company with a strong reputation in the public eye. 3. Ephotovn Ephotovn is another great photo retouching company with over 200 employees, capable of handling bulk orders effectively. Their team of Photoshop and Lightroom experts ensures you receive professional retouching services at an affordable price. They also provide a free trial, allowing you to test their expertise before placing an order. Whether you’re in need of ecommerce photo retouching or wedding photo retouching services, Ephotovn is an excellent choice for you. They offer a wide range of photo retouching services, including wedding photo retouching, ecommerce photo retouching, real estate photo retouching, jewelry retouching, model retouching, and much more. 4. Clipping Path Shop If you’re searching for a photo retouching company that pays attention to detail, Clipping Path Shop is one of the best options for you. They handle all types of retouching to ensure a product looks professional and clean, backed by a quality guarantee. Clipping Path Shop also offers a free trial for up to 5 images, allowing you to experience their skills before finalizing an agreement or placing an order. With over 150 employees, they have the capacity to deliver 4,000 images in a day. Their photo retouching services start at just $0.59 per image. They prioritize quality, image security, and a fast turnaround time. Additionally, they offer discounts for bulk orders and a monthly payment option for regular clients. If you’re seeking an ecommerce photo retouching company, Clipping Path Shop is the top choice 5. Retouchup Retouchup is an American-based photo retouching company similar to Pix The Photos. They provide comprehensive photo retouching services at $2.5 per image. Additionally, they offer digital oil painting for just $35 per image. Oil painting is quite challenging and requires an expert retoucher, so their ability to offer this service showcases their professionalism and skill. Retouchup was established by the team at Hollywood FotoFix, Inc. to offer a photo retouching solution tailored for professional photographers. They provide a 100% satisfaction guarantee with a 24-hour delivery time. There’s no minimum requirement for the number of images when placing an order. Whether you need edits for just a few images or a larger quantity, you can easily place an order and receive excellent retouching service. 6. pixelz Pixelz is the leading modernized company that offers photo retouching services through a combination of AI and human touch. After signing up on their website, you can adjust and customize your images according to your preferences. They have created a truly excellent client dashboard, allowing clients to request resizing, cropping, and other adjustments. They prioritize image quality and utilize the latest technologies in their photo retouching services. Their turnaround time is as little as 1 hour, with an on-time delivery percentage of 99.7%. Pixelz processes 40,000 images per day. They offer a wide range of photo editing services, including photo retouching, clipping path, background removal, color matching, invisible ghost mannequin, and shadow creation. 7. We Edit Photos We Edit Photos is another top-tier photo retouching service provider. With their expertise, they professionally edit your photos within 24 hours. They are renowned for their photo retouching services and offer a 100% satisfaction guarantee. If you’re an event photographer in need of photo culling services, We Edit Photos also provides photo culling at $0.06 per image. This can save you a significant amount of time, and you can then opt for retouching services once the photo culling is complete. We Edit Photos specialize in professional retouching for wedding, portrait photos, and glamour retouching. They also have a shop where they offer free Lightroom presets. Their services are an excellent choice for wedding photographers

10 Best Photo Retouching Service Companies of 2023 Read More »

Product Photography Lighting

Best Product Photography Lighting Guide in 2023

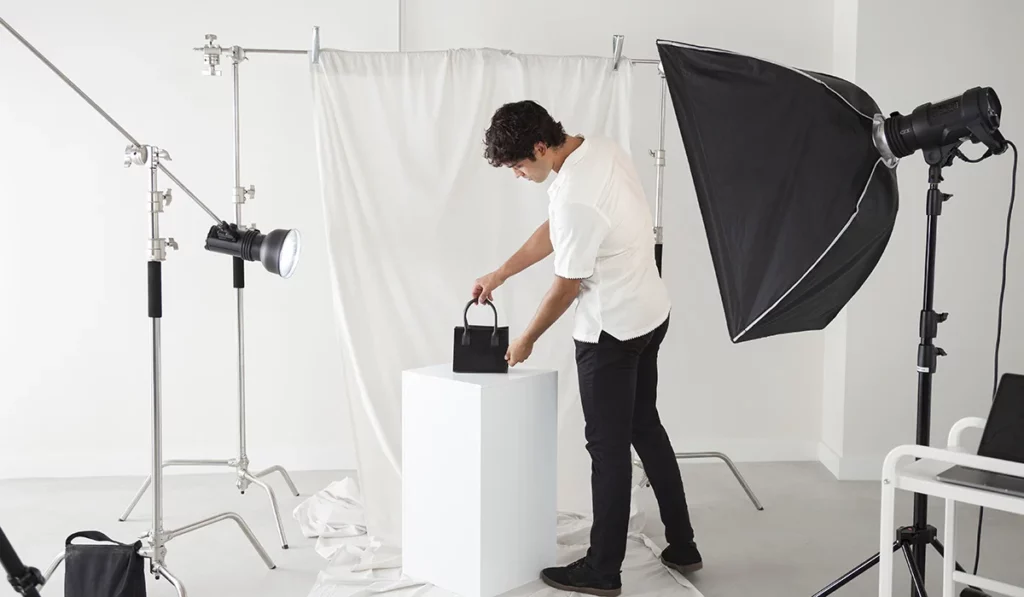
Every photographer knows that achieving outstanding results in product photography requires a proper lighting setup. Even with an expensive camera, the absence of appropriate lighting can hinder your final output. If you possess photography skills, two essential factors contribute to the best product photography results: setting up lighting in the right way and utilizing the best product photography camera. Professional photographers employ various common lighting setup techniques to achieve optimal results, and the 3-light setup for product photography is one of them. If you’re a beginner photographer, this lighting arrangement can greatly enhance your photo captures. The setup typically involves three lights: a frontal light (Key), a side light (Fill), and a backlight. Let’s dive in to learn how to set up product photography lighting perfectly. Product Photo Editing Service At Affordable Price Get A Quote What lights do you need for product photography? In the world of product photography, photographers often employ different lighting methods to achieve their desired results. The number of lights used can vary, with options ranging from a single-light setup to two or three lights, all dependent on individual preferences and budget considerations. Whether you opt for the soft glow of natural light or the controlled brilliance of a softbox, each lighting approach has the potential to yield exceptional photographs when executed skillfully. Two-Light Setup For product Photography View on amazon A two-light setup gives you greater control over the overall lighting balance. One light serves as the main source, illuminating the subject, while the second light, often placed at a lower intensity, serves to fill in shadows and provide a more even illumination. This setup helps to reduce harsh shadows and create a well-rounded, polished look. Photographers often use this method for products that require a more comprehensive representation while maintaining a sense of depth and dimension. Three-Point Lighting Setup for Product Photography Utilizing a proper three-point lighting setup is a time-honored technique for infusing photography and videography with depth, texture, and captivating visuals. This is where the concept of three-point lighting comes into action – a technique that holds the potential to elevate your photography from the ordinary to the extraordinary. What Is Three-Point Lighting? Three-point lighting is a fundamental lighting setup used in photography, cinematography, and videography. It involves strategically placing three primary lights around the subject to achieve balanced and captivating illumination. Key Light– The key light is the primary source of illumination. It’s positioned at a 45-degree angle to the subject, casting light on one side of the face or object. This light defines the subject’s shape and forms the base of the lighting setup. Fill Light– The fill light is placed on the opposite side of the key light, softening the shadows created by the key light. It helps to balance the contrast between light and shadow, creating a more natural and pleasing appearance. Backlight- The backlight, also known as the rim light or hair light, is positioned behind the subject, aiming at its back. This light separates the subject from the background, adding depth and dimension. It creates a halo effect around the subject, making it stand out and enhancing its contours. How to Set Up Three-Point Lighting? Setting up three-point lighting requires careful positioning and control of each light source. Here’s a step-by-step guide to help you achieve this classic lighting arrangement: Key Light Placement: Position the key light at a 45-degree angle from the subject. This angle produces appealing shadows and highlights that define the subject’s shape. Adjust the height and distance to achieve the desired level of illumination. Fill Light Placement: Place the fill light on the opposite side of the key light, mirroring its angle. This light should be less intense than the key light to soften shadows without eliminating them completely. Backlight Placement: Position the backlight behind the subject, aiming toward its back. This creates separation between the subject and the background, adding depth to the image. Adjust the intensity to prevent overexposure. Adjust Light Intensity: Experiment with the intensity of each light to achieve the desired level of contrast and mood. The key light is usually the brightest, followed by the fill light, and then the backlight. Consider using diffusers and reflectors to shape and control the light further. Diffusers soften and spread the light, while reflectors bounce light to fill in shadows. Single-Light Setup for Product Photography A single-light setup is a minimalist approach that can yield stunning results when used strategically. By focusing on a sole light source, photographers can create dramatic shadows and highlights that add depth and character to their product shots. Positioning the light at an angle can emphasize textures and contours, creating an alluring interplay of light and shadow. This approach is particularly useful when working with a limited budget or a desire for a more artistic and moody effect. What lighting should I use for product photography? When it comes to setting up lighting for product photography, continuous softbox lights and a reflector emerge as excellent choices. However, the selection of suitable lighting depends significantly on the specific requirements of your project, the intended outcome, and the available resources. Here are several lighting options to contemplate: Softboxes and Continuous Lights: Softboxes, coupled with continuous lights, create a winning combination for achieving exceptional product photography results. Softboxes diffuse light, producing a gentle, even glow that highlights details and reduces shadows. Paired with continuous lights, these tools offer real-time adjustments, making them suitable for both beginners and professionals. The soft, controlled illumination provided by this duo is especially effective for capturing textures and enhancing the visual appeal of products. Whether you’re photographing jewelry, cosmetics, electronics, or fashion items, the combination of softboxes and continuous lights is a go-to choice to illuminate your subjects flawlessly. Ring Lights:  While I personally don’t favor using a ring light for product photography, it’s worth noting that a high-quality ring light can indeed be utilized for this purpose. Ring lights are particularly well-suited for creating portrait photos or videos, making them an excellent choice

Best Product Photography Lighting Guide in 2023 Read More »