What is Clipping Path?
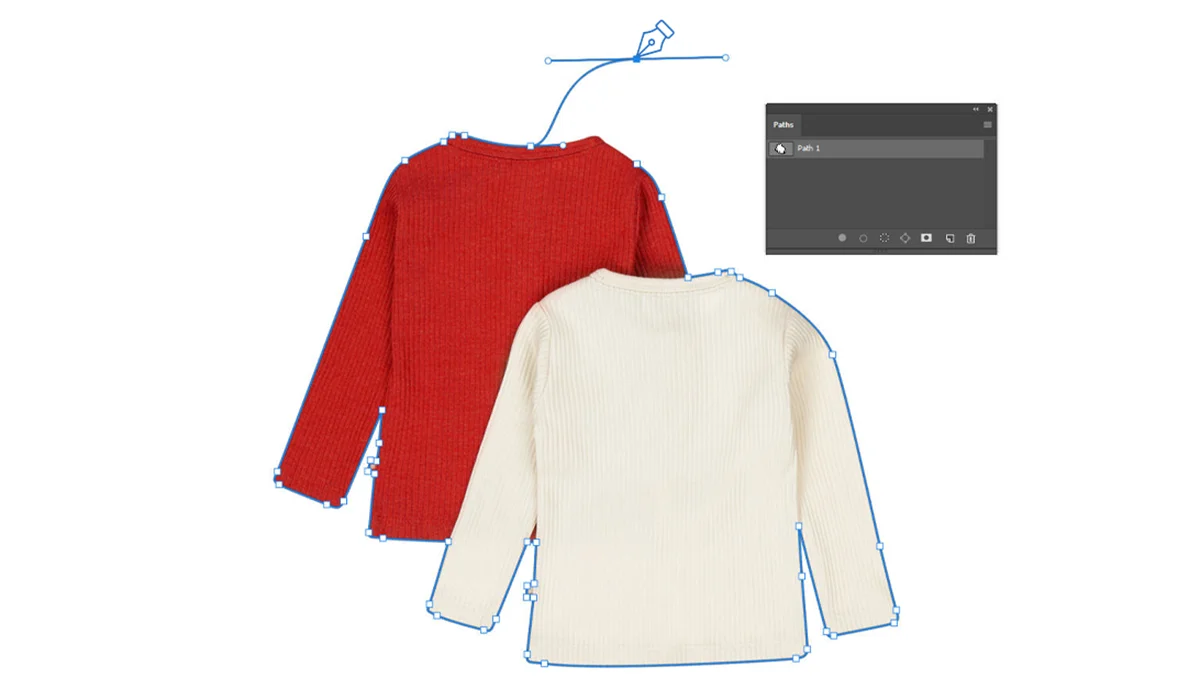
Clipping Path is a photo editing technique where Photoshop experts use the Photoshop pen tool to create a vector path around an object. This technique can be used to isolate an object from the background, allowing for precise editing of specific areas in an image.
There are thousands of clipping path companies worldwide that offer clipping path services. Why is clipping path service so popular? Many clothing and product businesses use plain white or grey backgrounds for their product images in online product catalogs.
After completing the photoshoot of their products, they need to replace the background in each image, which can be time-consuming. This is where clipping path companies come in, offering services that include background removal, image masking, photo retouching, shadow creation, and more, to assist business owners and product photographers.
How To Create A Clipping Path In Photoshop?
Creating a clipping path is an easy method in Photoshop using the Pen Tool, but perfection comes with experience and practice. From my experience, I can say that you need at least one month to master clipping paths for any object. There are many types of objects we create clipping paths for — some are quite easy, such as boxes or mugs. However, when it comes to complex objects or products, you need to practice more and more to make the output perfect and clean (for example: jewelry, trees, etc.).
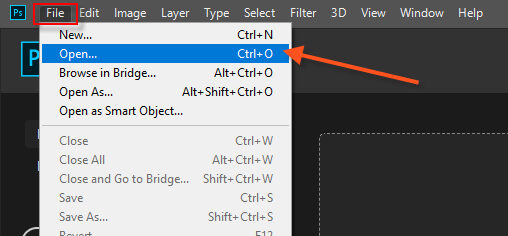
Step 01: Open Your Image in Photoshop
After launching Adobe Photoshop, navigate to the ‘File’ menu and choose ‘Open’ or use the keyboard shortcut Ctrl + O. Select the file you wish to work on to initiate the process of creating a clipping path.
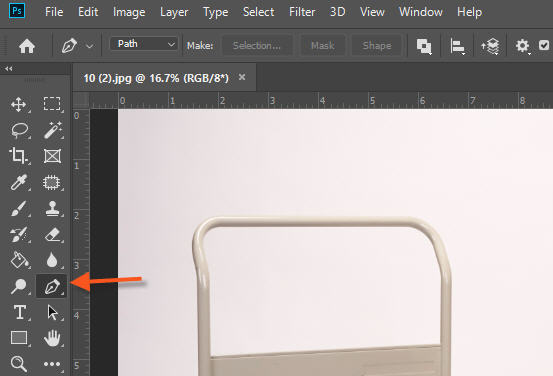
Step 2: Select Pen tool in photoshop
The Pen tool can be found in the main toolbar on the left side of Photoshop or press the “P” key on your keyboard as a shortcut. as shown in the image below.
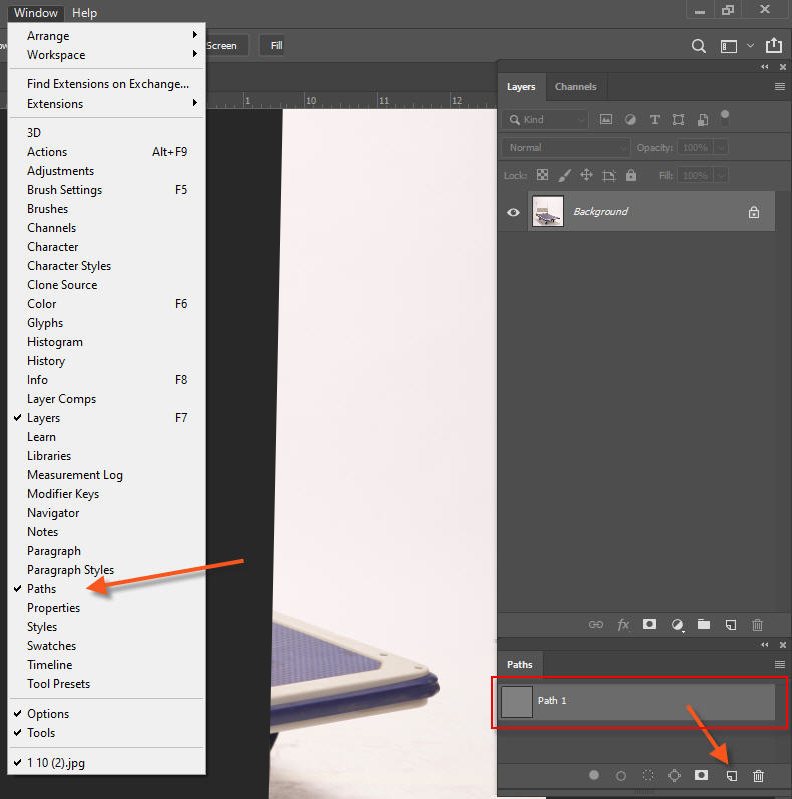
Step 3: Create a new work path
To create a new path, go to the ‘Window’ menu and click on ‘Paths.’ A window will appear where you need to click on ‘Create New Path.’ Now, start drawing a path around the object. Try to keep the pointer as close to the object as possible.
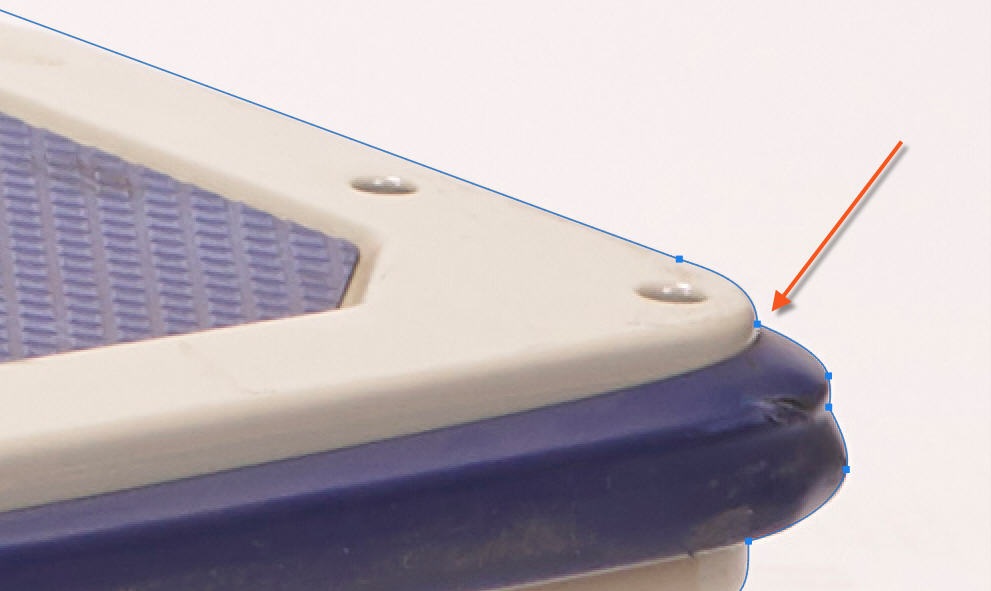
Step 4: Draw a clipping path around your product
When creating a clipping path, it’s important to make sure that the path is accurately clipped. Depending on the object’s shape, it might take more time to draw a clipping path. If you need to modify or tweak the path, you can do so by adjusting the points using the Direct Selection Tool.
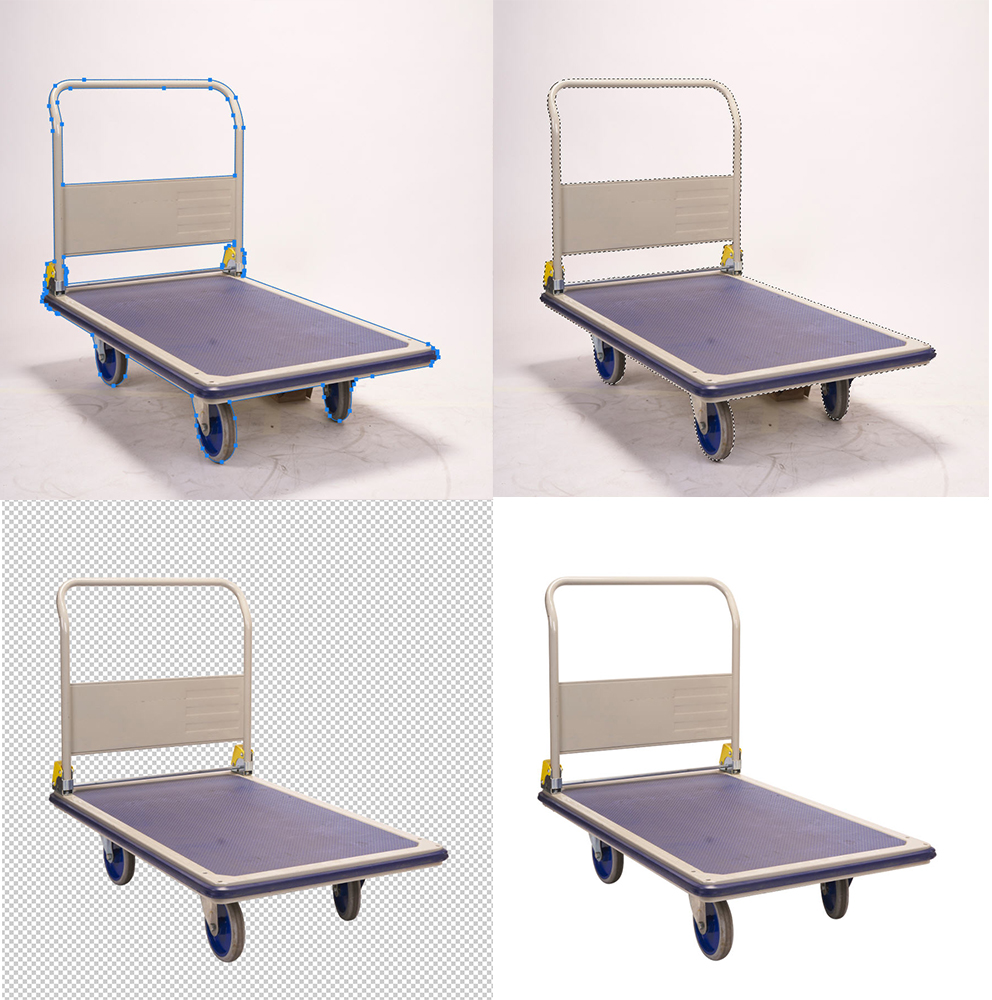
Step 5: Save your path
Now that you’re happy with the path you’ve created and have saved it, you can select it using “Ctrl+Enter” from the keyboard. You can now make the background transparent or replace it with a different background color.
Tips for Creating the Perfect Clipping Path in photoshop
You’ve learned how to create a clipping path in Photoshop, but when it comes to creating the perfect clipping path, make sure your path is close to the edge of the object. Secondly, ensure there are no stray bits of background poking through the edges of the object. Practicing regularly will result in better outcomes day by day! Try to use latest version of Adobe Photoshop.
Types Of Clipping Path In Photoshop
There are a few different types of clipping paths, but creating them is not too complicated:
Single-layer clipping path
A single-layer clipping path is a basic path made on one layer in Photoshop using the Pen Tool. This is helpful when you need to remove or adjust the background.
Multilayer clipping path
Multi-layer is perfect for retouching photos or modifying specific areas of a photo. A single layer separates one object from an image, while multiple layers separate multiple objects from the same image. This way, you can make changes to specific areas without affecting the rest of the image.
What Are the Benefits of Clipping Path?
There are many benefits of using a clipping path in Photoshop. Here are some of the most important ones:
- Improve the quality of your images and designs.
- You can replace the background.
- It can help you create cleaner, more polished-looking images.
- It can help you achieve a more consistent look for your images.
What is difference between clipping path vs image masking
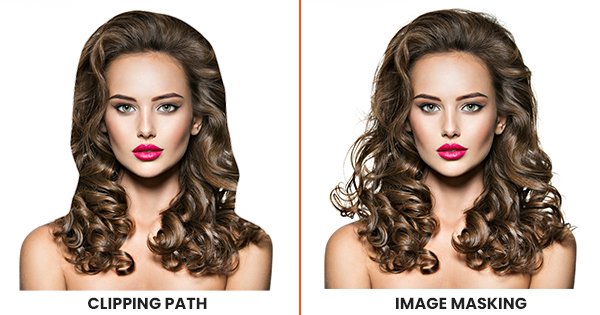
Clipping Path is a Photoshop editing technique used to cut out an object by creating a precise path around it using the Photoshop Pen Tool. On the other hand, image masking is a process used when an object needs to be selected but cannot be clipped easily. We usually use refine masking or channel masking to separate the object from the background — this technique is called image masking.
There are several ways to perform masking, and it’s especially useful for separating soft edges, fur, or hair from the background. For hard-shaped objects or those with clear and well-defined edges, it’s better to use the clipping path method to achieve a perfect result.
Object Selection tools can perfom like Pen tool?
No, the Object Selection Tool is an automated feature that uses AI to detect and select objects — but it often makes inaccurate selections, especially when the object’s color is similar to the background or when it has many soft edges.
In contrast, the Pen Tool is a manual method that allows you to select objects with precision and full control. While the Object Selection Tool is faster for quick tasks, the Pen Tool delivers highly accurate and professional results, particularly for complex shapes and detailed edges.
Final words
Creating a clipping path is an easy task, but for perfection, you need to practice and work with complex object shapes. This way, you can quickly learn the clipping path skill.
A clipping path is an important part of photo editing, where Photoshop experts use the pen tool to create a precise vector path around the object. After completing the clipping path, they can replace the background or make it transparent.